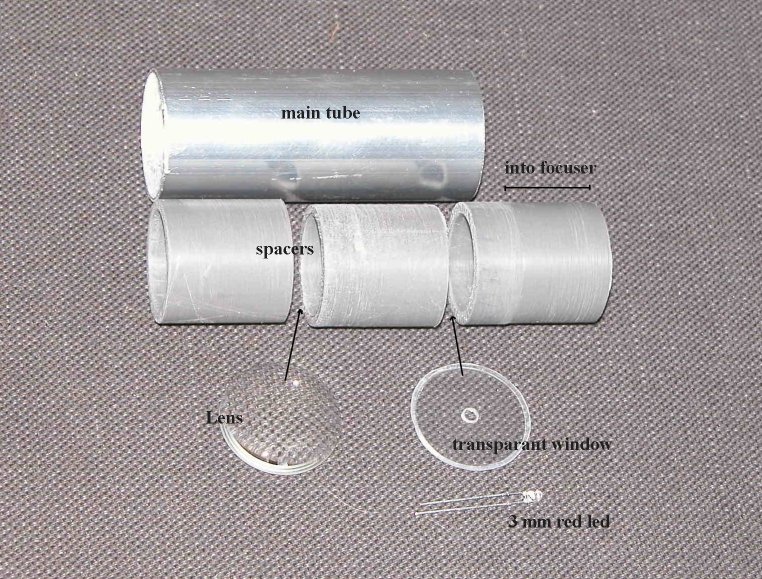
In the photograph below the parts of one of the 'Krupa's' I built are shown: the main tube, made of 35 mm outside diameter aluminium and turned to 1.25" inside diameter on my lathe, the spacers, made of 1.25" outside diameter PVC, the 1.25" diameter, 35 mm focal length lens, the transparant plastic window, with a hole for the 3 mm diameter, transparant 2000 MCD red led. The top of the led needs to be sanded off untill just above the light emitter and polished to be clear again. I was just making a mirror, so I polished a couple of minutes with cerium oxide. Look from the side while grinding the top away and take care not to damage the very thin lead to the chip. Sanding and polishing takes only five to ten minutes. Another important thing is blackening the led very well, exept for the sanded emitter side. That can be done with black paint. Just stick a small piece of tape on the emitter side of the led, dip the led in black paint and let it dry. This needs to be done a couple of times, to prevent light escaping -mostly from the rim- of the backside of the led. Look for light escaping from the back with a magnifier, because without a magnifier you easily mis it, while it can still be visible in use. I glued the led into the hole in the transparant window with some metal epoxy, but another kind of glue will also work. Total cost, including the lens is around $10,-.
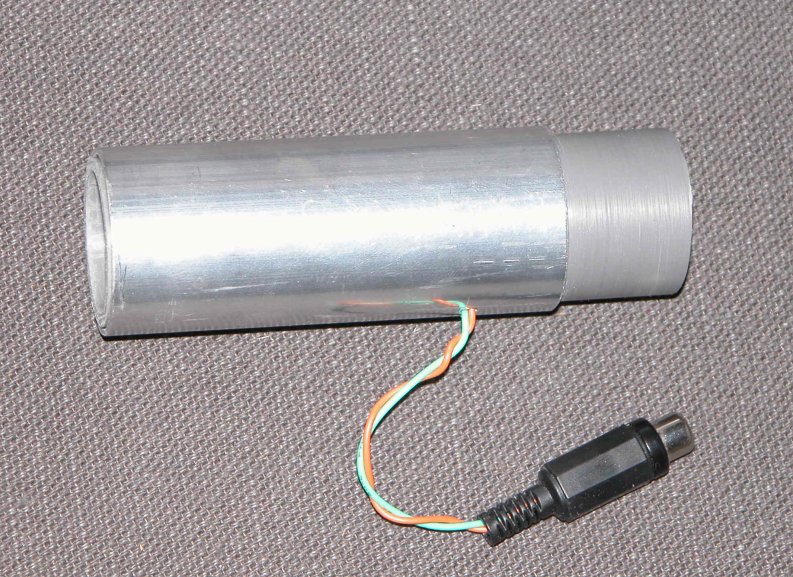
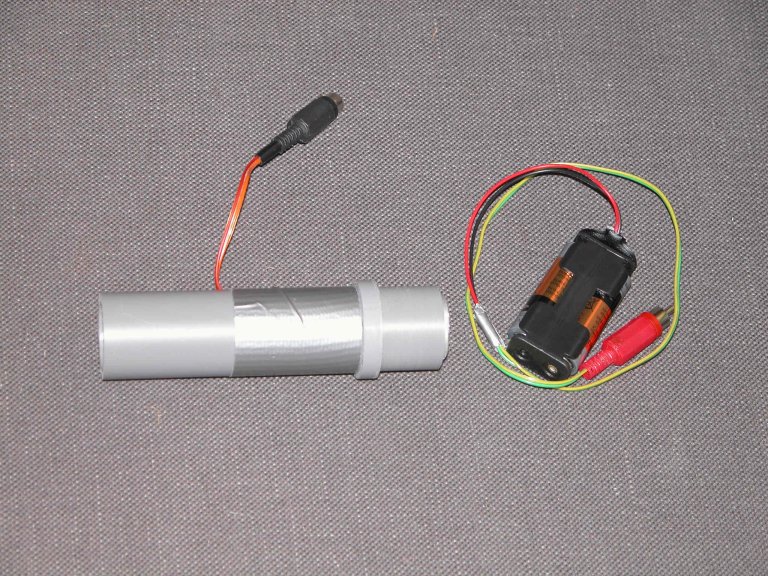
The pictures below show the assembled collimator and a second one I made, with the main tube made of PVC and the spacers (not visible) made of aluminium tubing. The leds are 1.8 Volt and run on two 1.5 volt AA batteries, with a 100 ohm resistor between the batteries and the led. On the second photograph below, the 3V battery pack is shown.
The collimator works very well and very accurately. When the krupa showed excellent collimation, this was also the case in my cheshire. It may take a couple minutes of practicing, to hold ones eye in the correct position to see the red transparent screen, the dark back of the led and the dark ring-shaped shadow of the primary mirror spot. With the eye too close to or too far from the lens or not centered, the red screen and the shadow of the mirror's center spot are not (optimally) visible or you will see only darkness. The collimator also works well with a non-perforated center spot, but but the accuracy of the collimation can be seen a bit easier when the spot has a central hole.
Below is a photograph of the inside of a Krupa collimator, made by Nils Olof Carlin. The red screen, the black back of the led and the dark shadow of the center spot are clearly visible. Also visible are the wires from the led to the battery pack.

Go to: main menu
Go to: A 20 inch f/3.6 computerized Dobsonian
Go to: Building a trilateral computerized 20 inch f/5 Dobsonian
Go to: Project: five 12 inch lightweight Dobsonians
Go to: Motorizing a 12 inch lightweight Dobsonian
Go to: 20 inch telescope
Go to: Equatorial platform
Go to: Scotch mount
Go to: Binocular mount
Go to: Dobsonian tips
Go to: Bending aluminium
Go to: Collimating
Go to: Making a Krupa collimator
Go to: Dotting the primary
Go to: A ballhead type telrad/finder mount
Go to: Mirror making log of 300 mm mirror
Go to: Astronomy
Go to: Using digital finder charts at the eyepiece
Go to: Astronomy links
Go to: Building a spherometer
Go to: Building a Bath interferometer
Go to: A Foucault-Ronchi-Lyot tester
Go to: Building a mirror making machine
Go to: Home
Email: Jan van Gastel